|

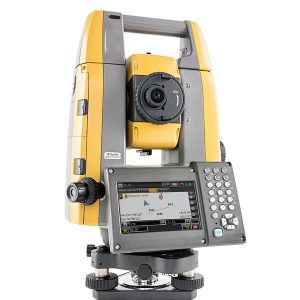
Ultra-Precision Measuring Station
0.5” Angle Accuracy
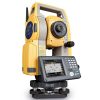
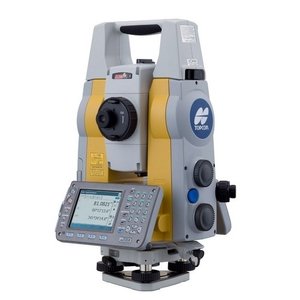
The MS05A employs innovative Independent Angle Calibration System (IACS) technology for unparalleled measurement reliability. Combined with market proven absolute encoders that incorporate advanced coding and digital-processing technologies, the MS05A provides the industry’s highest 0.5” (0.15 mgon) angle measurement precision.
The Sub-millimeter EDM opens the door to unprecedented precision
Cutting-edge distance measurement technology ensures unparalleled comprehensive performance. Using reflective sheet targets, the MS05A provides sub-millimeter accuracy with a range of up to 200 m. With its 3.5 km prism-mode long-range capability and fast measurement speed, the MS05A also satisfies every requirement for the reference EDM that is employed for precise baseline calibration.
- Sub-millimeter 0.5 mm + 1 ppm accuracy using reflective sheets within the range of 200 m.
- Measures prisms with 0.8 mm + 1 ppm precision up to 3,500 m.
- Reflectorless measurement can be performed with 1 mm + 1 ppm up to 100 m in range.
Monitoring
Effectively performs displacement and deformation monitoring using state-of-the-art automated measurement capability.
Tunnels
Measure tunnel convergence and deformation more efficiently.
Civil Engineering
Major Civil engineering tasks demand the highest accuracy and reliability possible. The MS05A/MS1A dramatically increases construction efficiency and accuracy with its superior measurement capability in combination with unique target systems.
Bridges
Precise measurements using reflective sheet targets and compact prisms enable high-quality bridge construction with short lead times.
Plant and Process Engineering
Position, geometry and dimensions of complex members of various plants can be measured with sub-millimeter accuracy.
When absolute accuracy is required and no compromise is allowed, the MS05A provides a flexible solution for the precise measurement of dimensional stability and geometry of important structures.
| SPECIFICATIONS |
| ANGLE MEASUREMENT |
MS05A |
MS1A |
| Telescope |
Magnification: 30x, Resolving power: 2.5”, Minimum focus: 1.3 m |
| Angle measurement |
Absolute encoder scanning. Both circles adopt diametrical detection. |
| Unit |
Degree / Gon / Mil, selectable |
| Display resolutions (selectable) |
0.1” / 0.5”, 0.02 / 0.1 mgon, 0.0005 / 0.002 mil |
| Accuracy (ISO 17123-3:2001) |
0.5”, 0.15 mgon, 0.0025 mil |
1”, 0.3 mgon, 0.005 mil |
| IACS |
Provided (Independent Angle Calibration System) |
| Automatic dual-axis compensator |
Dual-axis liquid tilt sensor, Working range: ±4’ (±74 mgon) |
| Distance measurement |
Modulated laser, Phase comparison method with red laser diode (690 nm) |
| Laser output*1 mode |
Class 3R Reflectorless / Class 1 Prism/Sheet mode |
|
Measuring range*2
With reflective sheet (50 mm)*3
One prism / mini prism
Reflectorless*
|
1.3 to 200 m
1.3 to 3,500 m / 1.3 to 800 m
0.3 to 100 m |
1.3 to 300 m
1.3 to 3,500 m / 1.3 to 1,000 m
0.3 to 200 m |
| Minimum display resolutions |
0.00001 m (0.01 mm) |
0.0001 m (0.1 mm) |
|
Accuracy*2 (ISO 17123-4:2001)
With reflective sheet*3
With prism
Reflectorless*4
|
(0.5 + 1 ppm x D) mm
(0.8 + 1 ppm x D) mm
(1 + 1 ppm x D) mm |
(1 + 1 ppm x D) mm
(1 + 1 ppm x D) mm
(3 + 1 ppm x D) mm |
| Measuring time*5 |
Fine: 0.9 s (initial 2.4 s), Rapid: 0.6 s (initial 2.0 s), Tracking: 0.4 s (initial 1.3 s) |
| Auto-pointing & Auto-tracking |
Pulse laser transmitter and CCD detector with co-axial optics |
| Auto-pointing range / -tracking range |
one prism 1,000 m / 800 m | mini prism 700 m / 600 m
360° prism 600 m / 500 m | reflective sheet (50mm)*6 50 m / n/a |
| OS & CONTROL |
MS05A |
MS1A |
| Operating System |
Windows CE Ver.5.0 |
| Display |
3.5in. TFT QVGA backlit color LCD, Touch Screen on both faces |
| GENERAL |
MS05A |
MS1A |
| Dust and water protection |
IP64 (IEC 60529:2001) – maintained with external connections |
| Temperature |
–20 to +50ºC (operating) / –30 to +70ºC (storage) |
| Size with handle & battery |
W201 x D220 x H375 mm |
| Weight |
7.7 kg (with handle & battery) |
| Power supply |
7.2V DC |
| BDC58 detachable battery |
Li-ion rechargeable battery, 7.2V, 4.3Ah, 2 BDC58 are included as standard |
| Operating time at 20ºC *7 |
Standard detachable battery BDC58: Approx. 3 hours
External battery BDC61 (Ni-MH, 13Ah): Approx. 9 hours |
Specification additionals
*1 IEC 60825-1:Amd.2:2001, FDA CDRH21 CFR Part1040.10 & 1040.11.
*2 Under good conditions: No haze, visibility about 40 km, overcast, no scintillation.
*3 When squarely aligned with the target.
*4 With Kodak Gray Card White Side (90% reflective). Reflectorless range/accuracy may vary according to measuring objects, observation situations and environmental conditions.
*5 Time of reflectorless measurement may vary according to measuring objects, observation situations and environmental conditions.
*6 When the measuring beam‘s incidence angle is within ±15˚ to the target surface, indoor conditions with sufficient contrast between the target and background.
*7 Auto-pointing with H&V 180° rotation and fine single measurement every 30 s at 20°C.
|

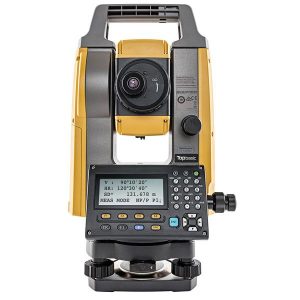
Long-range and Versatile Measuring Station
1” – 1 mm Accuracy
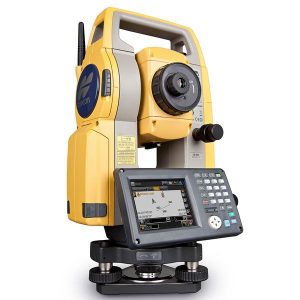
The MS1A is primarily designed for precise construction applications providing 1” (0.3 mgon) angle accuracy and 1 mm + 1 ppm distance measurement precision.
Wide Measurement Range
- A 200 m reflectorless measurement capability gives MS1A further versatility for applications where reflectors cannot be placed.
- Measures up to 300 m with 50 x 50 mm reflective sheet targets.
- Long-range capability reduces the need for changing instrument positions, resulting in higher work efficiency.
|

